How To Produce The Perfect 3D Landscape
 |
Landscape - a genre of art dealing with the depiction of natural scenery. It seems like an easy thing to do – we want to take a lovely landscape photograph of hills or the beach or the rolling countryside.
What could possibly go wrong with that? It’s right there in front of us. It doesn’t have to smile or pose, do its hair or ask the question ‘Do I look fat in this?’
And yet, once the pictures are sitting there on the screen in front of us, they don’t seem to look anything like the mental image we remember seeing when we pressed the shutter.
What is happening?
 |
Capturing successful Landscape images is not as straight forward as it would first appear. What we have done is take a three dimensional landscape and flatten it into a two dimensional image.
This alters how the landscape is laid out and therefore how we see it in the image.
 |
Gone are the perception of depth, scale and distance, things that we use to gauge how far away things are and that separate objects from each other.
In the image, subjects are stacked one on top of the other and flattened. They become indistinct from one another, jumbled up into a mass that we no longer recognise as a landscape with depth.
Worse still, if the picture is taken on an overcast, grey day with a flat sky, there isn’t enough contrast to give the image any punch or impact.
Landscape photography is not called an ‘Art’ for nothing. There is a definite skill in being able to capture a landscape in a photograph, while still showing depth and perspective and scale, but it is a skill that you can master, starting here.
There are a number of things YOU can do which will add these things into YOUR landscape work.
1. Get Some Perspective
The theory or art of suggesting three dimensions on a two-dimensional surface, in order to recreate the appearance and spatial relationships that objects or a scene in recession present to the eye; the appearance of objects, buildings, etc, relative to each other, as determined by their distance from the viewer, or the effects of this distance on their appearance.Perspective is the way we see things – the further away something is, the smaller it appears to be.
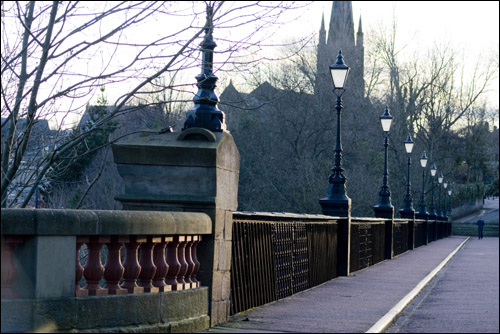 |
In this picture of a bridge, although the street lights are all the same size, you can see they get smaller and smaller the further away they get. You begin to get a feeling of depth and distance going into the picture the further to the right you look, even though the image you are looking at is flat.
Another way of adding to the perspective is determined by how far off the ground you position your camera. We can get stuck in the same routine of taking pictures from eye level, after all that is how we see the world.
But by altering the position that we take the picture from, we can add another aspect to the feel of the image and enhance what we are trying to convey.
 |
Think about taking your picture up high if you want a more aerial view or crouch down low to be on the same plane as an open scene. For a sweeping shot along the beach, shooting from very low down gives a great viewpoint, which leads the viewer into and through the picture.
2. Add Foreground Interest
 |
While it is nice to stand on a large grassy plain to photograph the countryside, in a picture it just becomes a large boring uniform block of color.
Adding something into the foreground not only breaks up the uniformity but it begins to separate the foreground from the background, another way to add the illusion of depth into the image.
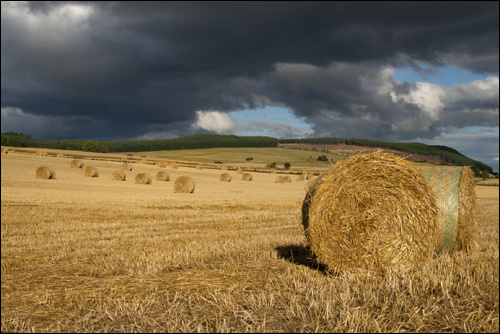
Here, the round hay bale sitting in the foreground adds texture and another dimension to the image’s narrative, as it sits waiting beneath the approaching storm cloud. This image highlights a primary principle important in all branches of photography.
3. The ‘Rule of Thirds’
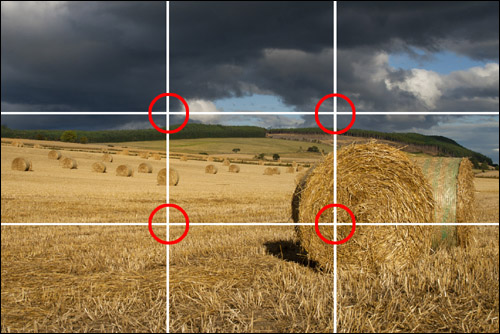 |
When composing any form of artistic picture, there is a compositional rule which helps position subjects inside the frame of the picture so that they give the image more interest and form a more pleasing impression of the picture.
The rule of thirds divides the image up using 2 vertical and 2 horizontal (imaginary) lines. The four points at which these lines cross each other are known as POWER POINTS or CRASH POINTS.
Placing a subject or part of a subject on one of these points can give your image more impact and energy than if you had just taken the picture with the subject in the centre.
This is NOT a 'set-in-stone' rule to be followed in EVERY picture. Some rules ARE made to be broken, so view it more as a guiding principle than absolute rule.
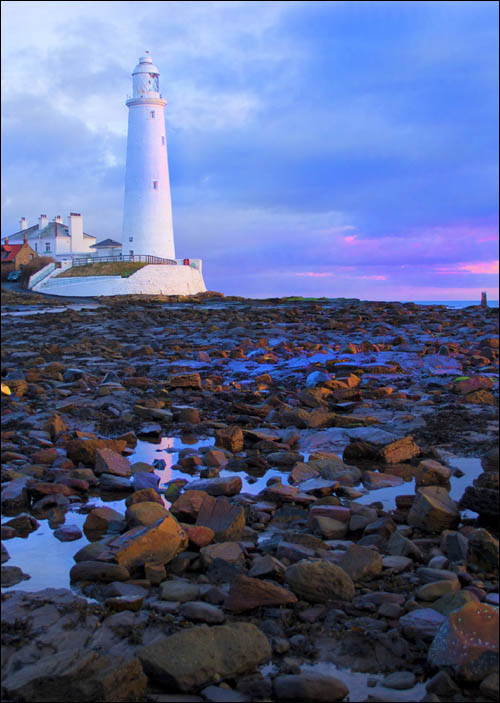
4. Landscape or Portrait?
Landscape may have given its name to the orientation of a picture with the longest side at the top and bottom, but that doesn’t mean you have to shoot all your Landscapes that way.If you picture lends itself more towards a portrait orientation, then why not?
Subjects like waterfalls flow vertically not horizontally, so shooting them in portrait style allows the water to cascade through your image from top to bottom, leading the viewer’s eye that way through the picture.
Experiment with the same scene by taking a variety of different shots and angles.
 |
 |
It doesn’t matter how many shots you take. Just delete the ones that don’t work. You will soon develop a feel for angles and subject matter that give you stunning pictures every time.
5. What is a Landscape?
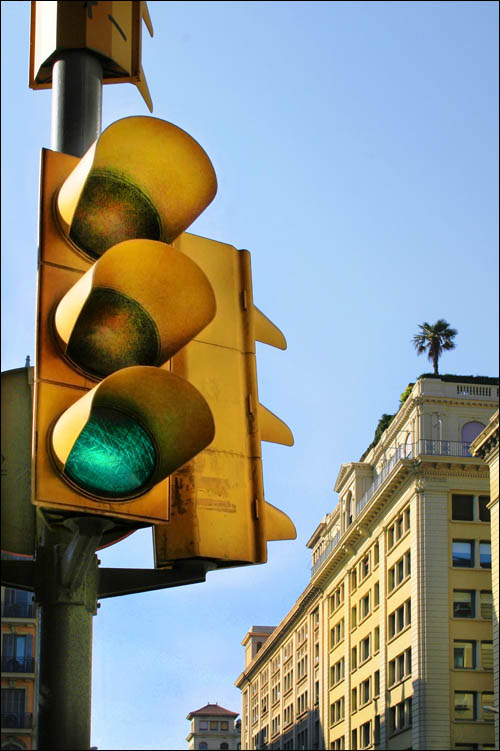
When is a Landscape not a Landscape? We used to think all landscapes had to have trees or mountains or something green in them, but by definition Landscapes depict the NATURAL scenery.So if you’re in a city, the natural scenery is not nature but man made. URBAN landscape imagery can have just as much impact as something Turner would have painted, if not more.
 |
 |
Cityscapes, graffiti walls, bridge structures all have a beauty and texture all their own. And if you can highlight and combine nature and man-made structures harmoniously, well it just brings the world to life!
You don’t need to travel far to find a Landscape. Why not take just an hour out of a weekend or evening and see what you can capture. Remember to include some of the components we’ve just been looking at and soon, you too will be taking fresh and amazing landscapes to be proud of.
| Didn't find what you're looking for? Search here... |

Custom Search
|
Return from Perfect Landscapes to Digital Photography Tricks

[?] Subscribe To This Site


Sponsored Ads
Recommended Reading

 |
Sponsored Links
David Coote
Wedding Photographer
Northern Ireland